


This guide will help you prepare a recording for distance testing. Due to the fact that neither MS Teams nor Adobe Connect support video output in a format suitable for long-term storage and subsequent electronic deletion from the Electronic File Service System of Charles University, we decided to find a solution using a freely accessible program – OBS Studio.
This program will make a recording of the desktop of your computer, which you will use to take a test. The record is already in a format supported by the Electronic File Service System of Charles University. Remember that your desktop is being recorded, so please keep MS Teams or Adobe Connect in the foreground for the duration of the test and do not click on other content/windows.
To simplify the complex settings, we have prepared a recording profile for you, which you can download and import to OBS Studio according to the instructions. Following this, check the settings and compare them with this manual, because different computers could have different configurations.
You will need the following to complete the installation:
- A computer in full configuration with an Internet connection (i.e. a connected microphone, camera, and other equipment as on the day of the exam)
- Administrative access to the computer
- WinRar or another program for opening .zip files (7zip…)
- A file with the profile for OBS (Profil_Statnice.zip); you can download it at the following address: https://cczv.cuni.cz/CCZV-283.html
For better understanding, you can also watch the video instructions (see above).
Should you have any additional questions or uncertainties, please contact: andrej.farkas@ruk.cuni.cz
1. Installation of OBS Studio
At the address https://obsproject.com/cs/download, download the installation package OBS Studio for Windows by clicking on the blue button “Download the installation package”.

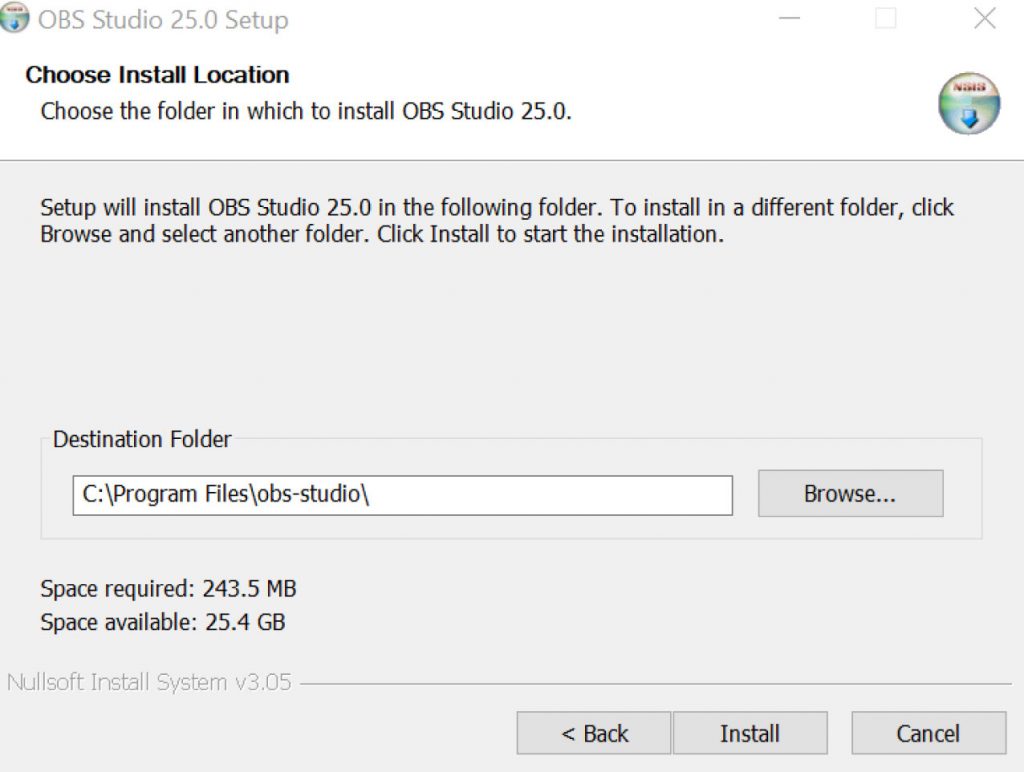
OBS Studio will be installed in the standard fashion. Just click on it. However, check the installation file “…\Program Files\obs-studio”.
2. Launching and settings for OBS Studio
The first time you start the application, you will be asked to start the wizard. This setting can be skipped.
By default, the application window is divided into an upper options bar, a preview of the future image in the middle, and a lower part for controls and settings.
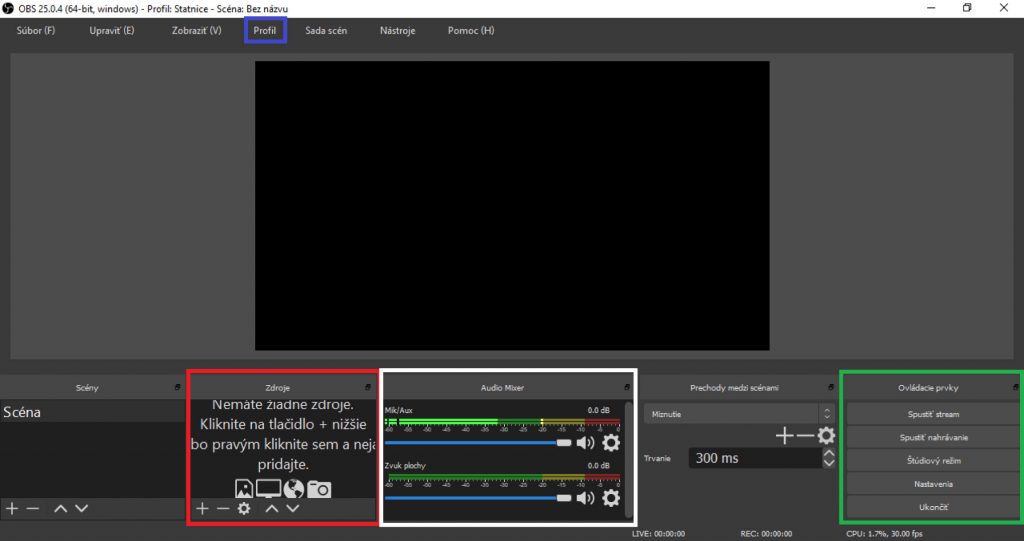
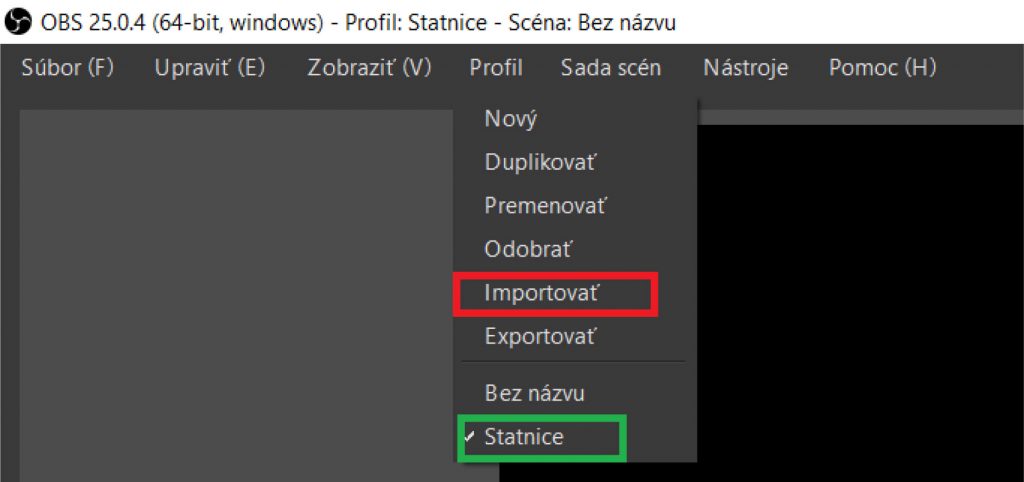
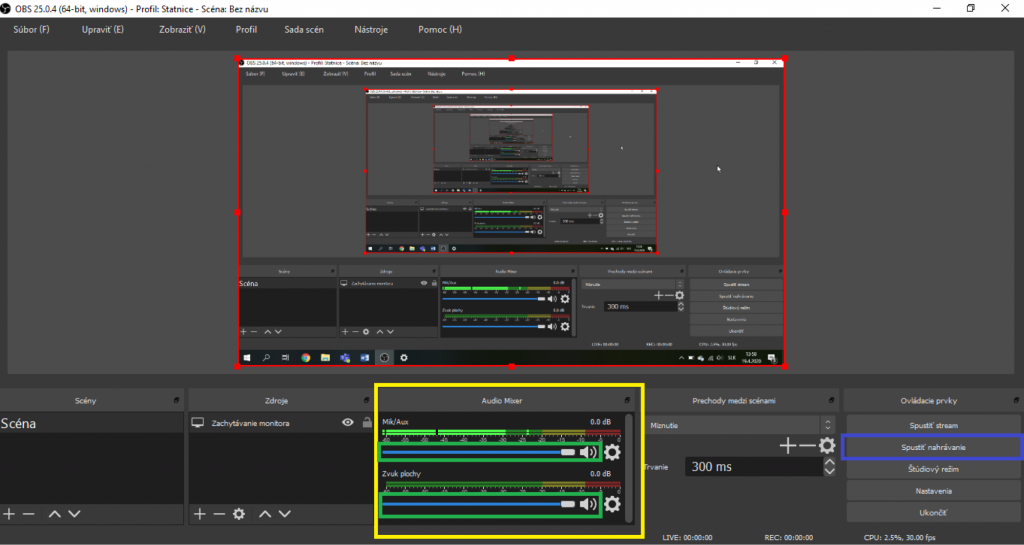
In the lower part, the important items for you are “Sources” (red), “Audio Mixer” (white), the group of buttons “Controls” (green), and “Profile” (blue) in the top bar. In the group “Controls”, there are the buttons “Settings” and “Start recording”. The essential buttons for us are highlighted.
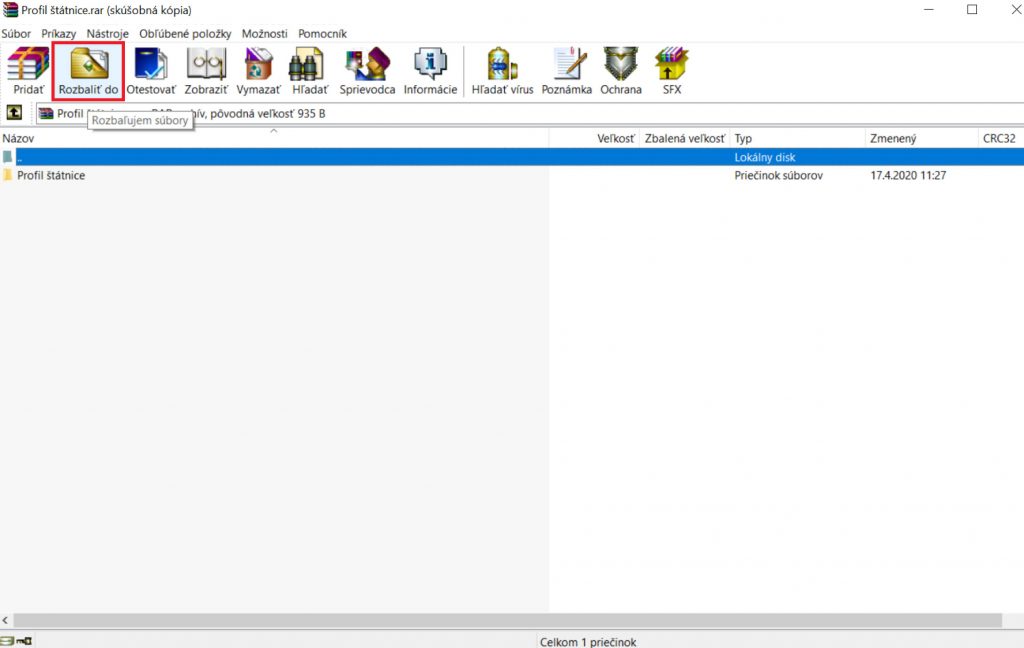
Do not set anything in OBS Studio yet. First, insert the profile you downloaded. This will take care of most of the settings. To do this, we will use the WinRar program or another program to open zip archives.
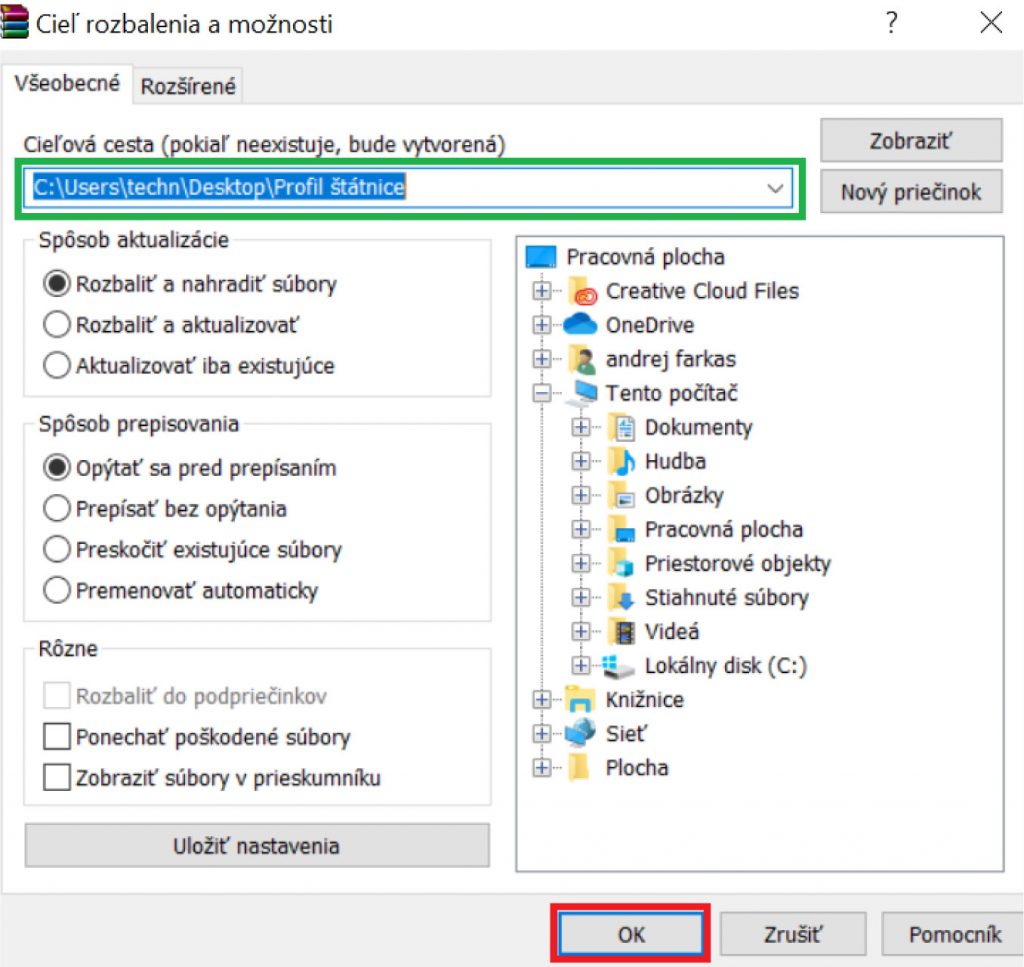
Open the file “Profil_Statnice.zip” and extract it (Extract, red). In this way, you create the folder “State exam profile” in the location of the downloaded file “Profil_Statnice.zip”. If you want to extract it in another location, change it in the green field.
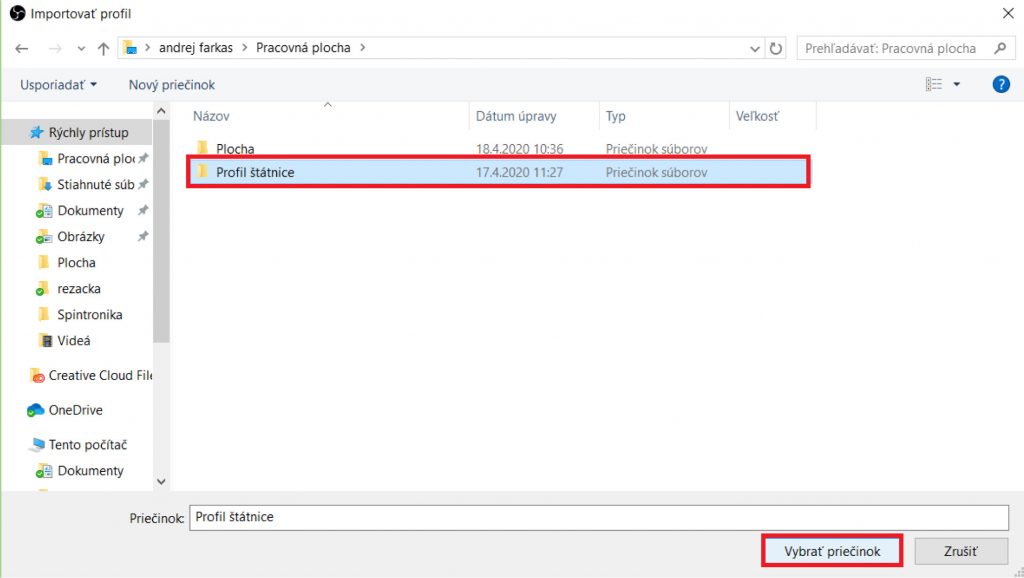
Now return to OBS Studio. Click on the “Profile” button in the top bar, then select the “Import” option (red). In the dialogue window, select the “State Profile” folder (red) that you extracted in the previous step. This configures the record to the required parameters. Then click on the “Profile” button again and select the “State Exam” profile (green) that you imported.
Then check that you have all the settings in order. In the “Controls” button group (far right), select “Settings”. You can compare all the items with the image at the beginning of Chapter 2.
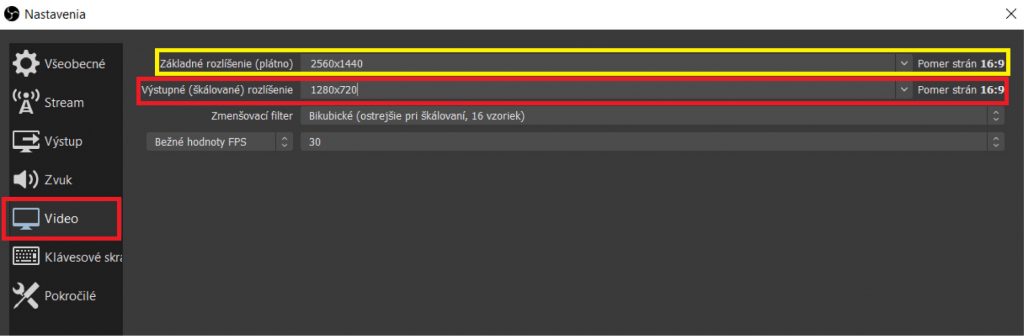
Select the “Video” section and check if the output resolution is 1280×720. The basic resolution should be the same as the resolution of your monitor (yellow). To check, you can click on Basic Resolution and select the highest item from the menu.
Now select the “Sound” section, in which you will check that you have selected “Desktop sound” as “Default” in the device options and similarly in “Mix/Aux”. In general, you should have the option “48 kHz” selected.

Last of all, check the “Output”. First, select “Output Mode” as “Advanced”. (blue) Select the “Recording” tab (pink) and select the folder where the recording will be saved. (green) Then make sure “Soundtrack” 1 and 2 is checked. (red) Compare the other settings with the image. (yellow)
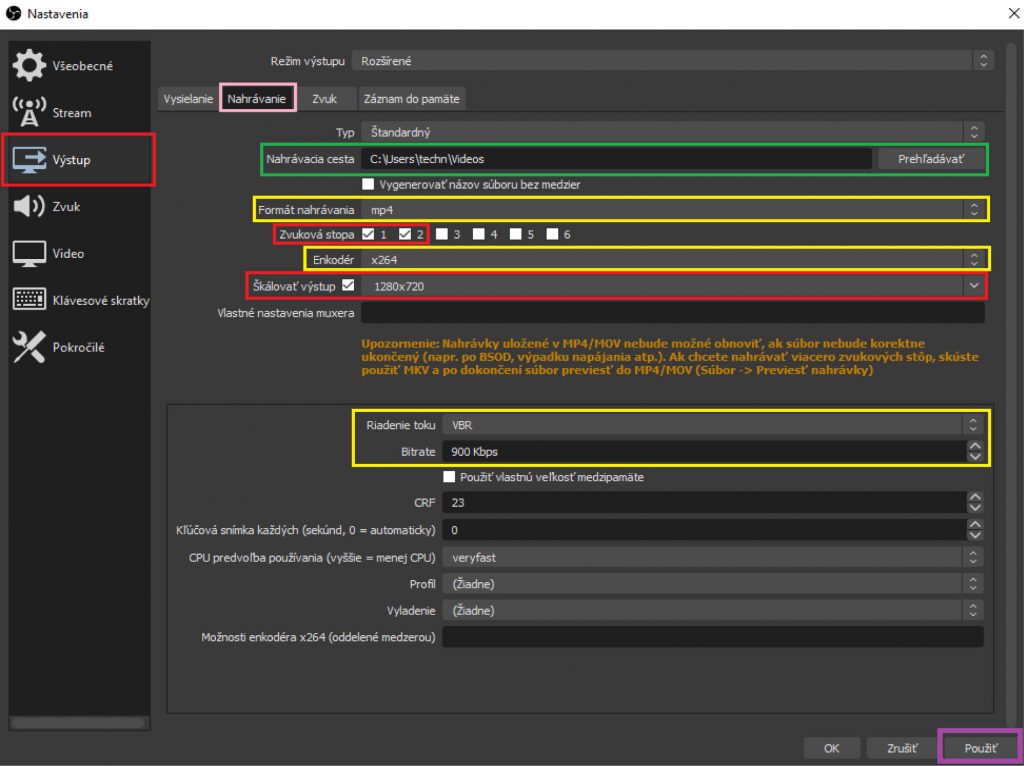
Now click on “Apply” (violet) and close Settings.
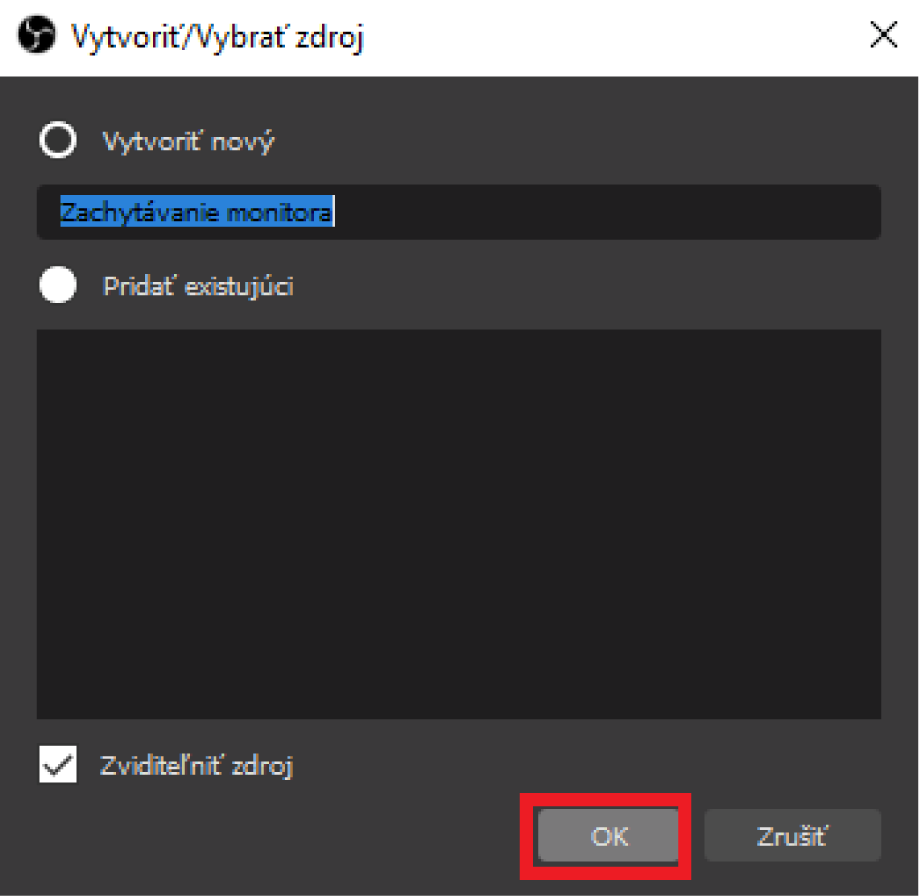
As the last step, set the source of the screen. In the “Sources” section (second item from the left), click on the button “+” and select from the menu “Capture monitor”.
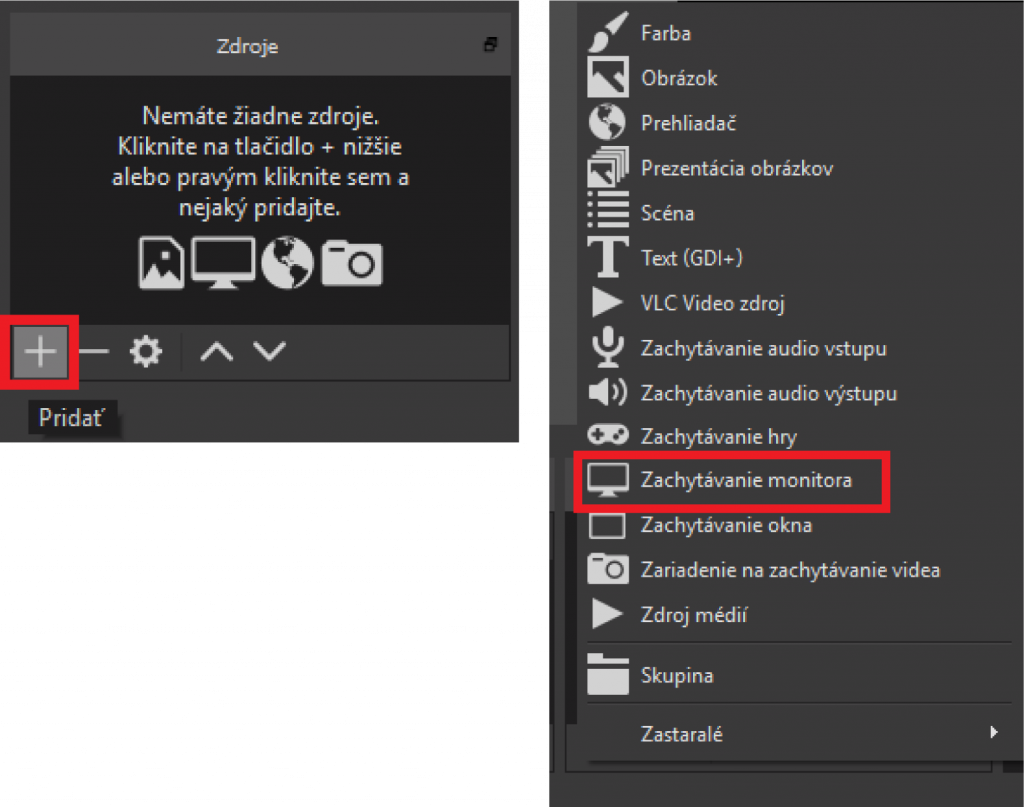
If you have a computer with only one monitor, all you have to do is click OK in both pop-up windows; if you have multiple monitors, you must select the one on which you will have the MS Teams or Adobe Connect window open.
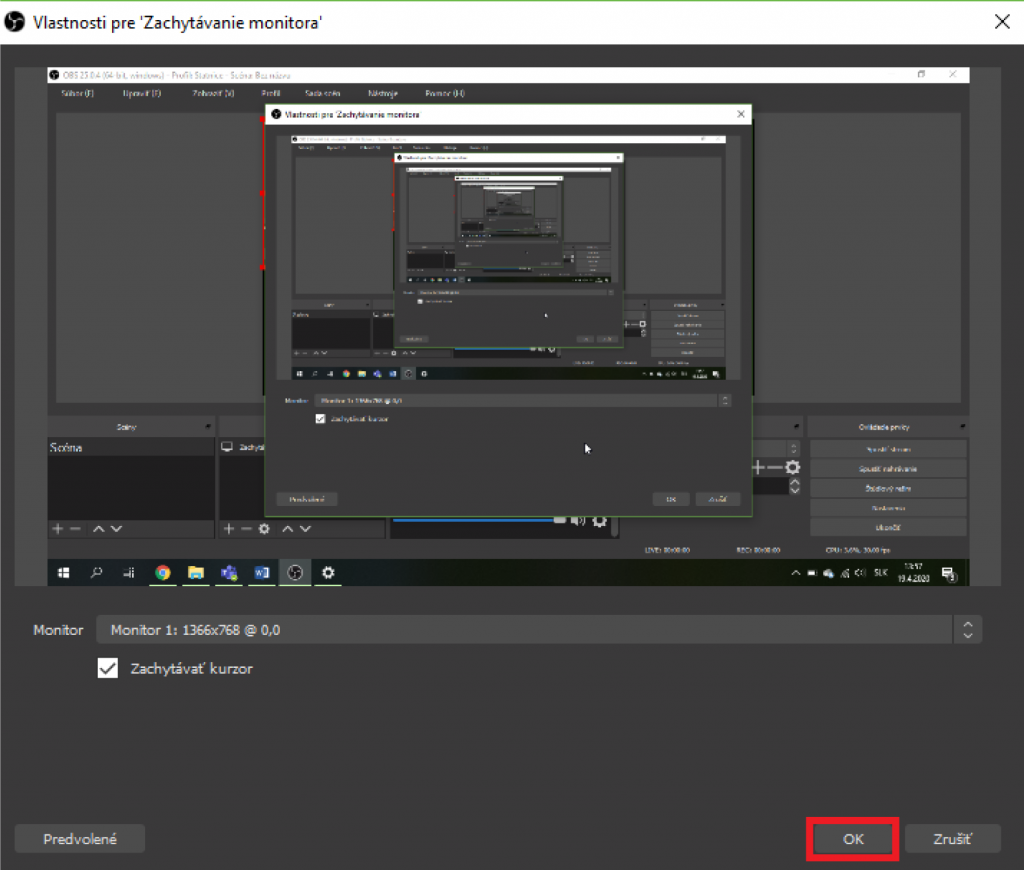
Make sure that the image in the centre of the OBS window is completely filled with the image of your monitor. If not, use the red points in the corners to stretch it.
OBS Studio is now set up.
However, always test the connection with the student before recording. If both audio and video are working properly for you, return to the OBS program and, in the “Audio Mixer” section (yellow), adjust the volume level with the slider (green) so that the level is orange during normal speech. The top slider is your microphone, and the bottom is the student’s sound.
You can start recording with the “Start recording” button (blue) in the “Controls” section.


