


This procedure will help you create a meeting in Zoom to prevent the participation of uninvited guests and Zoombombing when an uninvited student joins the room without your knowledge and starts sharing inappropriate content. Use the following steps to plan secure meetings in Zoom: ]
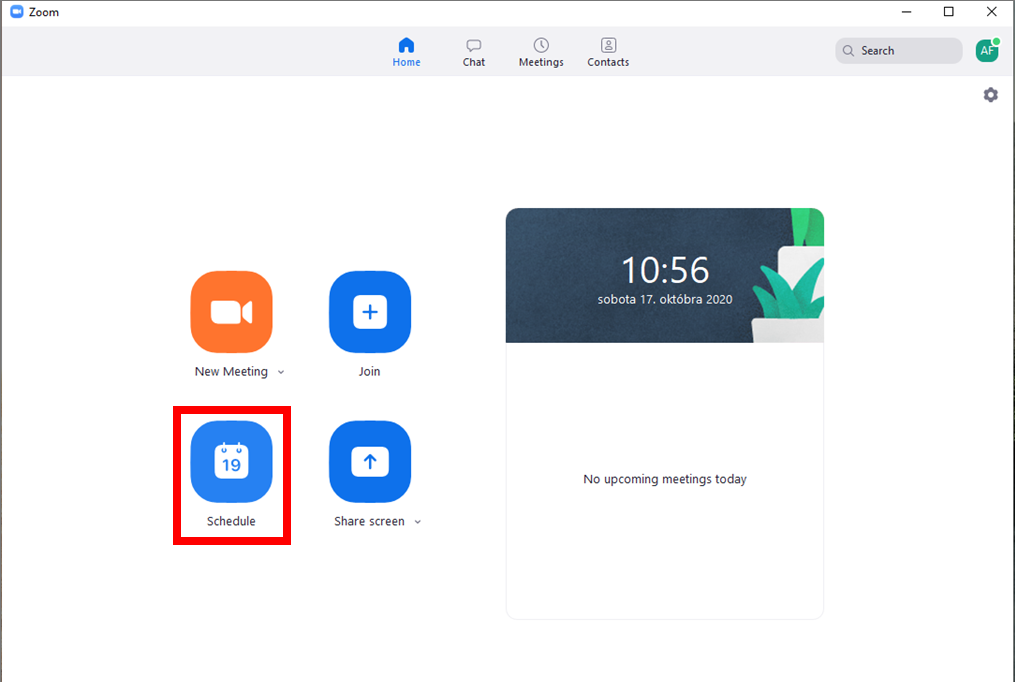
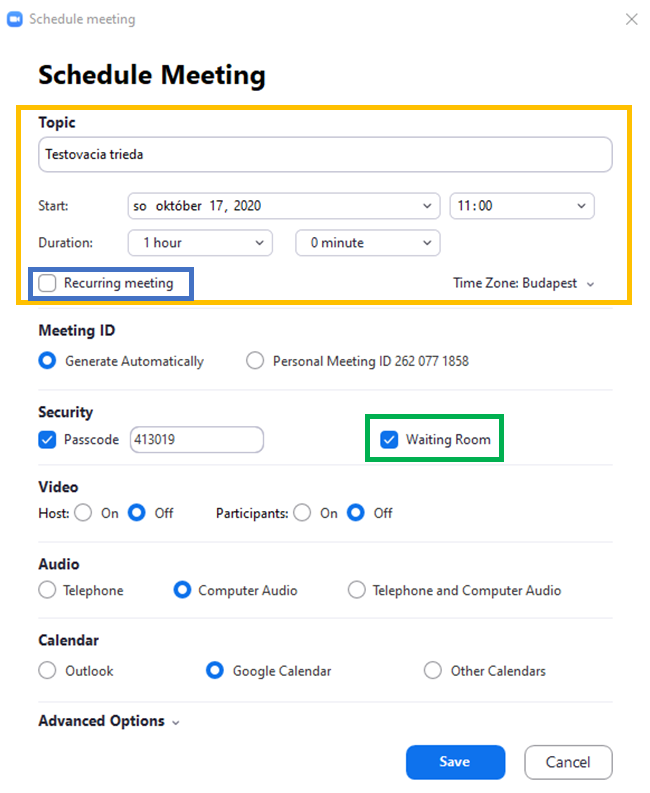
- Click on Schedule (red). Fill in the name of the meeting/lecture (yellow) and select the time and date of the meeting. As a guideline for students, you can also select the duration of the meeting. If it is a regularly scheduled meeting, select Recurring meeting (blue). Then select Waiting room (green). Do not change any of the other settings. When finished, click on Save.
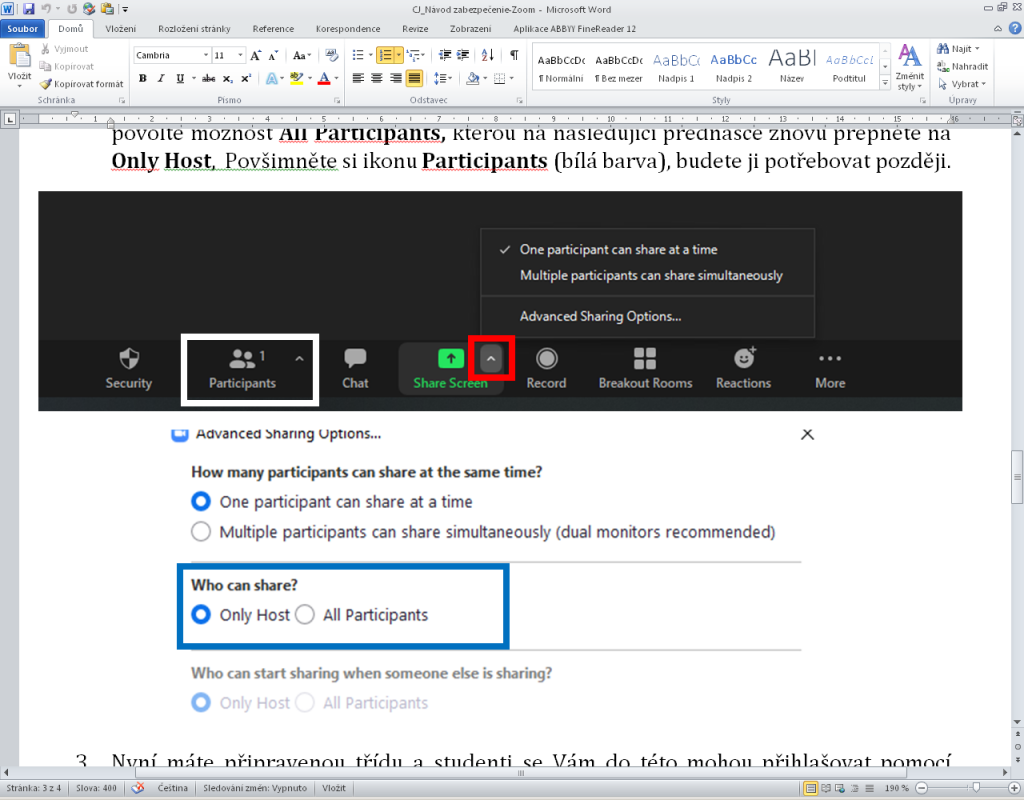
2. After starting a meeting, check the settings for screen sharing. Click on the arrow next to Share screen (red) and select Advanced Sharing Options. If your lecture does not require sharing students’ desktops, select Only Host (blue). If your lecture requires students to share their desktops, select All Participants. You can switch back to Only Host for the next lecture. Notice the Participants icon(white). You will need this at a later time.
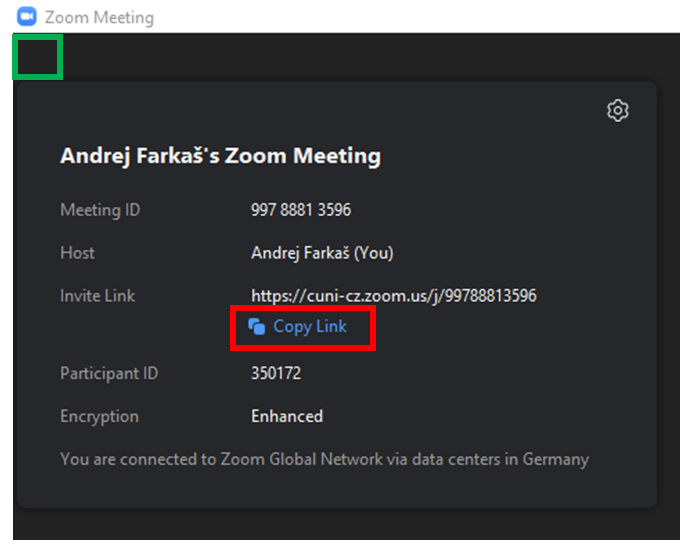
3. Your class is now set up, and students can log in using the link you generated at the beginning or you can copy it (red) by clicking on the icon in the upper left-hand corner (green), after which you will see the following window.
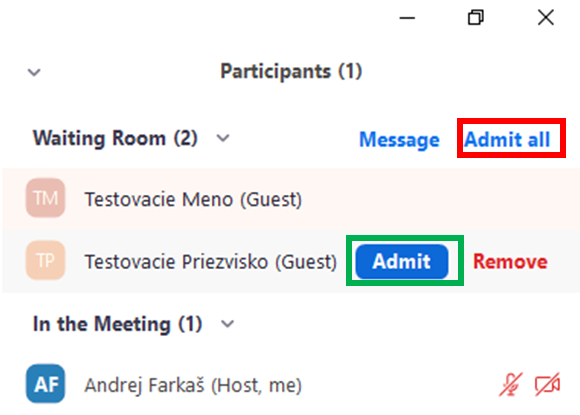
4. After clicking on the link, students will enter the Waiting Room. You can view the registered students by clicking on the Participants icon. Send students information in advance on the organization of the online instruction explaining that they should use their full names when logging in. If you log in with different abbreviations or with a different name, you will not be admitted to the class. You allow a student into the class with the Admit button (green), which is displayed when you hover over the name with your mouse. If the name is not your student, you can remove it by clicking on the Remove button. You will perform this procedure for all students. You can also use the Admit All button (red), which lets all students into the Waiting room. Use this procedure only if these are the names of your registered students.
5. If you want to restrict the rights of students in a class, you can do so by clicking on the Security icon in the lower panel and selecting the rights in the Allow participants to: panel. Thus, you can prevent them from chatting, renaming (white), or turning on the microphone (red). If you revoke this right, you must manually turn on their microphone by hovering over their name in the Participants panel with your mouse.


